
I just had the privilege of participating in my first quilt swap, and boy was it fun! It was all top secret, so the lovely lady I was assigned to as my swap partner had no idea that I was sending this to her - all the way to Australia, no less! Samantha (@aqua_paisley) received it today, so we're in the clear now, to share this little tutorial.
This tutorial uses the Kaleidoscope Smart Plate Ruler.
However, if you don't have this Kaleidoscope ruler (and don't want to shell out much cash right now), you could use this paper piecing Kaleidoscop pattern (for $2) by Rita of Red Pepper Quilts, and it's the exact size you need for this project! (Note: If you choose to paper piece instead, make 25 (4") blocks, and skip to step 8)
Pillow Sham:
To make this into a pillow sham, follow the steps for piecing and quilting the front. You can make the back with an envelope closure, or follow my preferred method, with a hidden zipper. A zipper just seams to keep the pillows more fluffy (and stops them from fluffing out the back opening!) I follow this fabulous tutorial from Pile 'O Fabric.

Kaleidoscope Mini
Quilt (or 20" pillow sham)
20.5" finished
Materials:
(37) 5” charm squares(18) 5” background squares (I used low-volume fabrics)
22” square for backing
22” square batting
Binding – 90” length
Kaleidoscope Smart Plate Ruler

General Information:
4” finished block
¼” seam allowanceHST: Half Square Triangle
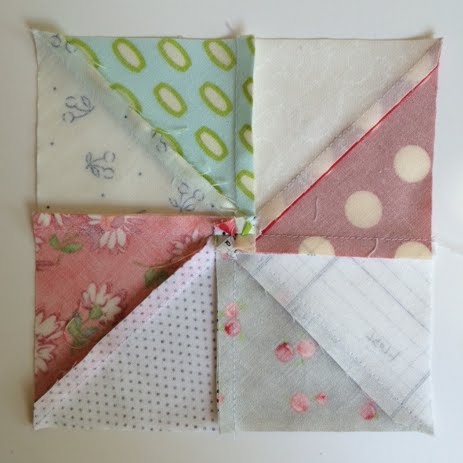
“A” Block: pinwheel with background fabric
“B” Block: colored pinwheel with background fabric corners

(37) 5” squares – print fabric
(18) 5” squares – background fabric
1 - Set aside (13) squares
2 - Sub-cut (6) into 2 1/8” squares (4 per square) – for a total of 24 small squares.
3 - Now cut each of these small squares on the diagonal, making 48 triangles.

Now let's get started!
Step 1 - Pair up your squares as follows:
13 prints with 13 background squares ("A" blocks)12 prints with 12 more prints ("B" blocks)
Step 2 - Sew around the entire outside edge of a 5” block set. (repeat for all A & B sets)
Step 3 - Cut each square set diagonally (both directions), from corner to corner. Press open.
(Note: Don’t worry about trimming the corners of the HST’s now – you will trim them in a later step)


Step 5 - Sew your sets into pinwheels, by sewing each group of 4 HST's together. Repeat this step, to make (13) “A” blocks and (12) “B” blocks.


Tip: Before you start, place a piece of painters tape right below the line on your ruler that you are using (in this project, the 4" line), so you don't have to re-find it each time. (I learned this about half-way through and it sped things up remarkably!)

Ok - now for the "A" blocks...

Use the narrow wedge on the ruler, and line up your 4" block line with one of the background fabrics on your pinwheel. Trim along both edges.


Repeat on all 4 sides


Press & trim tips off.


Your first row will be (L to R): block A-B-A-B-A.
Alternate layout for each additional row. (5 rows total)
Step 9 – Sew all
5 rows together. Press.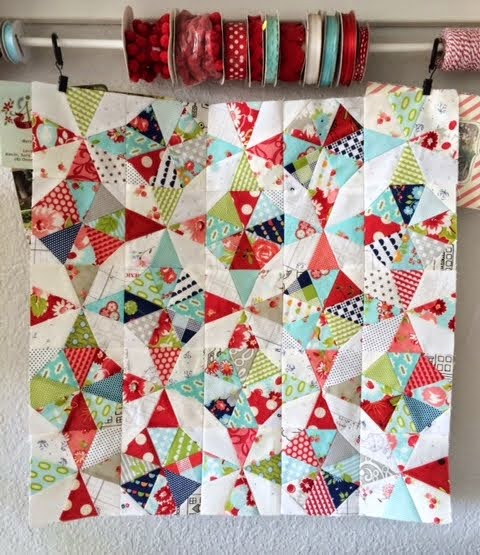
If you are making a pillow sham, baste & quilt as desired. And follow this tutorial (click here) for making the back. Remember, your finished pillow sham size will be 20.5"!
Good luck!
And there you go! You've got a fabulous Mini-Quilt, or a 20" pillow cover.
